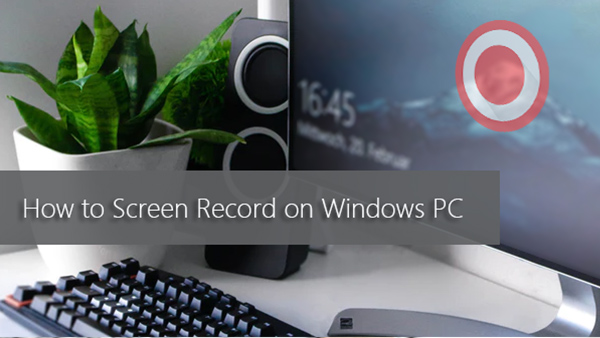
How to Record Screen on Windows Computer/Laptop
This is an easy guide on how to capture any screen activity on Windows 10, 8, 7, and XP computers. You can do it with or without audio, in full screen, or just in a selected area. It’s applicable to Windows 11 as well.
Video is changing our lifestyle! We spend more time on video streaming services to enjoy movies, TV shows, sports matches, live broadcasts, and such. We prefer to chat with family and friends through video or audio calls rather than typing long texts slowly. Even when we want to learn something new, we tend to watch videos instead of struggling with word-to-word papers in the library. Videos are not always flawless, since you will run into problems.
For example, you want to download your favorite films or courses for (offline) watching only to find the platform doesn’t allow you to do so; You’d like to capture some on-screen actions for making demos by yourself but don’t know how to; You’ve tried many “best recorders for Windows” but they just disappoint you for different reasons…
Well, with the help of a feature-packed screen recording helper like RecMaster, you won’t have such matters anymore.
Table of Contents
How to Capture Various Screen Videos on Windows 11, 10, 8, 7, and XP
You are suggested to free download RecMaster. With the slick 1080p/4K screen recorder, you can record gorgeous gameplay clips and full-screen/partial-screen videos of any content on screen.
RecMaster is all-around screen video recording software for Windows and Mac, which offers 7 different recording modes. Besides game recording, it also includes full-screen recording, custom-area recording, webcam recording, program window recording, follow-the-cursor recording, and audio-only recording.
Additionally, you are free to adjust video parameters, use hotkeys, show keystrokes, set auto-recording tasks, and more.
;rgba(153,153,153,0.1);rgba(153,153,153,0.5)" dur="2s" repeatCount="indefinite" /></rect></svg>)
Features of RecMaster
RecMaster supported video/image formats: MP4, AVI, FLV, GIF
RecMaster supported video quality: Standard, High, Original
RecMaster supported video frame rate: 20fps, 23.976/29.97/60 (NTSC), 24/25/30 (PAL)
Webcam overlay: Y
Mix internal system audio: Y
Mix microphone narration: Y
Add cursor/watermark effect into the video: Y
Easy edits: Y
Social share: Y
Here in this guide, we will put our focus on how to screen record on Windows 10, 8, 7, and XP. If you need to do the same recording stuff on your Apple screen running macOS 10.7 or later, just apply the same workflow.
Now please free download and install the lightweight software on your machine.

;rgba(153,153,153,0.1);rgba(153,153,153,0.5)" dur="2s" repeatCount="indefinite" /></rect></svg>)
After that, launch it to do the specific recording as you need.
Content Navigation:
Part 1. How to Screen Record Gameplay on Windows 10/8/7/XP with RecMaster
RecMaster’s “Gameplay Mode” enables gamers to record crisp gaming video at up to 4K @60fps (if the monitor is 4K). So when you plan to record DirectX game segments on PC, just follow the steps below. Supported popular games include The Witcher game, Dark Souls, CS Go, and more.
Step 1 – Launch Software
Open the software and click the leftmost “Game Mode” function button on the main UI to jump into the next interface.
Step 2 – Do Recording Settings in Advance
With RecMaster v2.2, you will find the game detected. If it’s not detected automatically, you can press Alt + Tab to switch between the game and RecMaster interface several times. And if it couldn’t detect at last, you can choose Full-Screen which helps record both the game and your webcam.
;rgba(153,153,153,0.1);rgba(153,153,153,0.5)" dur="2s" repeatCount="indefinite" /></rect></svg>)
The default settings are normally the best options with the best match of quality and size. You can keep the default settings or change anyone according to your actual demand. For example, you change the resolution to Original while recording 4K-quality gameplay on your 4K monitor.
And in the Settings section, you can also customize the mouse cursor, hotkeys, or watermark effects.
Path: Menu >> Settings >> Video
;rgba(153,153,153,0.1);rgba(153,153,153,0.5)" dur="2s" repeatCount="indefinite" /></rect></svg>)
There are other options you can do with Game recording, but not limited to the Game Mode. You can capture multiple monitors simultaneously by dragging and choosing in Custom Area mode. With Full-screen mode, you can also show your front camera on the screen with audio.
Step 3 – Record and Edit (If Necessary)
Press the red circle “REC” button to record after the 3-second countdown. You can also use the “Alt + 1” hotkey to start the game recording right away. Whenever the recording has come to an end, just stop the recording by typing the “Alt + 2” hotkey.
Note that all the hotkeys are changeable under Settings. The Gameplay video may be long and large. If you need to cut it into smaller shorter pieces, tap the “Edit” icon located on the recording list to do the easy cutting.
More Words on Windows 10 Gameplay Recording:
For Windows 10 users, Xbox Game Bar/DVR (a built-in app of the system) is a good bet to do an easy game recording. By simply typing “Win + G” and then “Win + Alt + R”, you are on the way to recording a high-quality MP4 video at 30fps by default.
A convenient app indeed, however, it can only record one program for up to 4 hours. It means any other pop-up windows would stop the recording.
Here’s another alternative way for Windows 7, 8(.1), and 10 use to grab brilliant gameplay videos. It is to take advantage of the superb hardware configuration from Nvidia or AMD (if there is one). You can use its powerful performance to do the in-game recording work vividly.
Nvidia ShadowPlay is a typical example.
Related reading: 11 Best Game Recording Software for Windows
Part 2. How to Record Full-Screen Video on Windows 11/10/8/7/XP with RecMaster
In some cases, you need to capture the entire computer screen to create an instruction video, a Keynote presentation, or similar. And the “Full-Screen Recording” of RecMaster gives you quick access to one-click capture anything on the desktop. It covers the taskbar, menu, and cursor.
By related settings beforehand, you can also work out a picture-in-picture footage with webcam and mic audio for an explanation.
So, just follow the 3-step instruction below to record the whole region of your screen as easily as ABC: ;rgba(153,153,153,0.1);rgba(153,153,153,0.5)" dur="2s" repeatCount="indefinite" /></rect></svg>)
Step 1 – Download and Open RecMaster
Get the free version downloaded and installed on your Windows. Then launch it and press “Full-Screen Recording” to navigate to the next panel.
Step 2 – Adjust Settings
You can choose whether to record the system sound and microphone. And you can also choose whether to show the webcam.
And as regards the video settings, the default settings are the best matches for video quality and size. But you can still set them according to your need. You can choose the video format, quality level, and frame rate.
And also, you can open the Settings window from Menu to decide the cursor and watermark effect. Shortcut keys are also adjustable according to your favor. By default, “Alt + 1” is used to start or pause recording, and “Alt + 2” is to stop recording.
Step 3 – Record and View
Tap the REC button or “Alt + 1” to start. During the recording, you can use the Draw Panel to take annotations. When it’s time to finish the recording process, use the “Alt + 2” hotkey easily. After that, you will see your final video in the video list, where you can also enter into a built-in video editor to cut and export.
Part 3. How to Screen Record Selected Area on Windows 10/8/7/XP with RecMaster
RecMaster offers much flexibility on the screen recording, and that’s where the “Selected Area Recording” comes in. It saves the video authors much time by allowing them to customize and record a particular area on the desktop as necessary. And as a result, the raw video piece can be uploaded online or sent to the viewers directly without further cropping. Moreover, to some degree, this is a good way to avoid any privacy disclosure. Well, let’s check through how RecMaster works:
;rgba(153,153,153,0.1);rgba(153,153,153,0.5)" dur="2s" repeatCount="indefinite" /></rect></svg>)
Step 1 – Open and Choose a Region
On the main UI of RecMaster, hit the “Custom Area” button to choose the region you will specifically record with the mouse. Alternatively, you can reset the resolution for computers or smartphones by choosing one that’s preloaded. And please note that the options will depend on the resolution of your computer screen. It means you won’t have the 1920*1080 option if the screen width and height are less than 1920 and 1080.
Step 2 – Set for Video or Audio
Like the two recording modes above, it still allows you to change settings of video formats, fps, as well as whether to turn on the webcam, computer, or MIC sound.
Please note that in Custom Area mode, the webcam and keystrokes will be recorded only when they are quoted in the recording area.
Step 3 – Record and Finish
Hit REC to begin the capture. You can add rich annotations by using the Draw panel.
When the recording is done, do press “Alt + 2” to stop it. Then your movie will show on the video list. And you can play it, one-click upload it to social or edit it with the built-in video editor.
When using this function, you are suggested to pay more attention to the pick of video aspect ratio, vertical or horizontal (see how to record horizontal video), square or landscape. Because only when the final video fits the end player can the target audiences make the most of it.
For video marketing, the mobile force has become quite prominent. And mobile-friendly vertical video outperforms the other three in terms of engagement, views, etc.
Part 4. How to Screen Record the WebCam on Windows 11/10/8/7/XP with RecMaster
When your Windows computer or laptop is born with a front camera or equipped with another decent webcam, you can make use of it to output more video types. For instance, a self-introduction video, singing video, markup video, performance video, teaching video, entertainment video, and more. The integrated Camera app of Windows simply could record MP4 webcam video at up to 720p, while RecMaster supports 1080p capture at most. And it also provides additional functionalities like adding watermark, editing, and one-click upload to pop sites.
Generally, the microphone should be turned on during the shooting unless you intend to do dubbing or add background music afterward.
You can refer to the following guide:
;rgba(153,153,153,0.1);rgba(153,153,153,0.5)" dur="2s" repeatCount="indefinite" /></rect></svg>)
Step 1 – Choose Webcam Recording Mode
Either full screen or selected area recording feature gives you the option to record the computer screen with a webcam. And only the Webcam mode supports shooting without showing the computer screen. And you can use not only the inner or external webcams but also a mobile phone as a webcam.
Let’s go ahead with the Webcam guides.
Step 2 – Do Settings for Camera and Output Video
If there is more than one integrated camera, then you can pick anyone you like. You can still have your own idea on whether to get the system or microphone audio recorded or not. Besides video frame rate, video format and resolution are adjustable, too.
Step 3 – Record
Tap REC and get your performance started.
Part 5. How to Screen Record in Other modes on Windows 11/10/8/7/XP with RecMaster
With RecMaster, you can also record in Program Window Mode, Follow Cursor Mode, and audio-only mode.
Program Window Mode
In Program Window mode, you can record a program window without having other windows interfere with it. As long as the window size is not changed, minimized, or maximized, the recording will be all right. The recording will not be affected by other windows covering it.
Follow Cursor Mode
In Follow Cursor Mode, you can choose a screen size and start the recording. You will be able to record the set size around your moving cursor. It is very useful if you hope to record some tutorials or focus on something around your cursor.
;rgba(153,153,153,0.1);rgba(153,153,153,0.5)" dur="2s" repeatCount="indefinite" /></rect></svg>)
Audio Only Mode
In Audio Only Mode, you are able to record sound from your computer, and/or your microphone. Please note that if you only need to record the sound you hear from your computer, you can disable the Microphone. Or there will be environmental noise recorded.
And what should you do if you hope to enhance your own voice or computer audio? You can simply tick the System Sound Gain or Mic Gain on Sound Settings.
;rgba(153,153,153,0.1);rgba(153,153,153,0.5)" dur="2s" repeatCount="indefinite" /></rect></svg>)
Bottom Line
We use the computer screen a lot, on which there is so much information we may wish to reserve locally or share with others. No matter for personal or business purposes, the screen recorder is badly needed here. As one of the best screen recorders for Windows (11/10/8/7/XP), RecMaster is able to tackle any screen recording task you may need with ease. And it gives you ultimate control over what to capture, and how to capture it on your monitor. It also helps record audio only and record screen video with facecam.
Related Windows Guides: How to Screen Record on Windows 7 How to Record Screen on Windows XP ![]()
Frequent Asked Questions
1). How do I record my Windows screen?
You should rely on a dedicated screen recorder for Windows 10 like RecMaster. It can help you get the Windows screen record at high quality with the system’s sound or microphone voice. As a flexible desktop screen recorder, RecMaster enables you to record at any possibility. For example, the full screen or select a certain area to record, annotate the capture, define the output video quality as you want, and also edit & share the recorded file to YouTube.
2). How do I record the Windows screen with audio?
RecMaster gives two settings on the recording screen on PC with audio. They are System Sound and Microphone. You can turn them on or off and adjust their volume on the recorder. If there is more than one mic source, you can choose either to grab during the recording process.
3). Does Windows has an internal screen recorder?
Only Windows 10 and 11 have a built-in screen recorder and its name is Game Bar. You can simply press the “Win icon + G” on the keyboard to pop the Game Bar’s interface up on the screen. And then you can start the recording on gameplay or any application window with ease. Other Windows systems like Windows 8(.1), and Windows 7 or lower don’t have such bundled screen recorders as Windows 10/11.
RecMaster
Screen recording made easy.
Record every moment on your PC or Mac within few clicks.
Download Download
-
How to Use RecMaster, a Screen Recorder with Timer & Auto-Stop
-
How to Record Tutorials Like a Pro Using RecMaster?
-
The Top Halloween Screen Recorder Deals 2025
-
Step-by-Step Guide: How to Record Gameplay Without Lag?
-
RecMaster’s Secret Weapon: The Full Guide to Using the Annotation Tool for Killer Tutorials
-
RecMaster Pro-Tip: Direct MP3 Output for Scheduled Recordings (Audio-Only) 🎧
-
How to Promote Your Game with a Stunning Gameplay with RecMaster?
-
The Ultimate Guide: How to Record Mafia: The Old Country Gameplay with RecMaster?
-
How to Record Gemini Storybook with RecMaster?
-
How to Record Bendy: Lone Wolf Gameplay with RecMaster?
-
How to Set 1-Click Beauty with RecMaster for a Better Look?
-
How to Record in the Best Video Quality with RecMaster (with VBR or CBR)
-
How to Blur Your Webcam Background in RecMaster: A Quick Guide
-
How to Use Spotlight Tool in RecMaster?

RecMaster – Record Every Moment on Your Computer Screen
Record 1080p or even 4K clips at 60fps to maintain the high quality still.
Flexible settings for mouse cursor effects, watermark and annotations.
Preloaded with recording scheduler, video editor. Allow one-click sharing.
Bianca Willis
Bianca Willis started her copywriting career since 2014. As a tech editor with over 6 years writing experience, she has worked out hundreds of posts on multi-media solutions (video recording included), hot gadgets and troubleshooting tips.
Related & Hot Articles


Subscribe to keep up with the latest software discounts , news, and updates.