How to Record Screen with Webcam on Windows and Mac: A Comprehensive Guide
Being able to record your screen and capture video via the webcam at the same time is an invaluable resource in today’s world of digital. This ability beneficially applies to fields specifically in education, software development, and content creation where showing actions on the screen are paired or accompanied with real-time commentary or instructions. In this article, we will take you through how to clearly and professionally cover yourself by recording your screen effectively with a webcam be it on a Windows or Mac platform.
;rgba(153,153,153,0.1);rgba(153,153,153,0.5)" dur="2s" repeatCount="indefinite" /></rect></svg>)
Table of Contents
About Screen Recording with Webcam
Screen recording with a webcam is the process of capturing the activities taking place on your computer screen while at the same time capturing video feeds from your webcam. The technique finds use in creating tutorials, making presentations, as well as giving personalized feedback. It serves as a more involving mode of communicating compared to the other mode whereby all that was displayed on your computer screen was recorded.
Benefits of Integrating Webcam in Screen Recording
The use of webcam footage in screen recordings makes the content a lot more valuable for the viewer. It makes the video personal and quirky and also makes it a lot easier for the viewer to have a reference or to relate, connect, and interact with the video. Some of the benefits of integrating webcam footage into screen recordings are:
Making Communication More Effective: Visual information provided by the presenter combined with visual stuff displayed on the screen allows a viewer to have a complete insight into the presented material.
Adding Personality to Tutorials and Presentations: People relate more to content having a human face, thereby improving the effectiveness of your tutorials and presentations.
How to Prepare for a Webcam Screen Recording
But before you even jump to the recording, ensure that you are well-equipped and prepared:
Required Equipment and Software:
Equipment: Computer (Windows or Mac), webcam, microphone
Software: RecMaster Screen Recorder for Windows and RecMaster Screen Recorder for Mac.
RecMaster is a screen recorder to record screen with webcam on Windows and Mac, your voice, the system audio, annotations, and more. All settings can be done in clicks.
;rgba(153,153,153,0.1);rgba(153,153,153,0.5)" dur="2s" repeatCount="indefinite" /></rect></svg>)
;rgba(153,153,153,0.1);rgba(153,153,153,0.5)" dur="2s" repeatCount="indefinite" /></rect></svg>)
Steps to Record Screen with Webcam
Steps to Record Screen with Webcam on Windows
1. Download and install RecMaster
2. Choose a recording mode.
To make it available for recording screen with webcam, you can choose among the Full Screen, Custom Area, and Follow Cursor modes.
;rgba(153,153,153,0.1);rgba(153,153,153,0.5)" dur="2s" repeatCount="indefinite" /></rect></svg>)
3. Enable the Webcam and choose the audio.
You can enable and choose the right Webcam on the webcam dropdown list. You can even set your smartphone as a webcam to get better video quality and flexible views.
Besides, you can choose whether to record the system sound and your voice on the microphone.
;rgba(153,153,153,0.1);rgba(153,153,153,0.5)" dur="2s" repeatCount="indefinite" /></rect></svg>)
You can also drag the webcam window to a proper place and click to switch the webcam shape from rectangle to circular.
;rgba(153,153,153,0.1);rgba(153,153,153,0.5)" dur="2s" repeatCount="indefinite" /></rect></svg>)
4. Start the recording by pressing REC or Alt+1.
If you are using the Custom Area or Follow Cursor modes, please make sure that the webcam screen is included in the recording area. Or the webcam will not be recorded in the screen video.
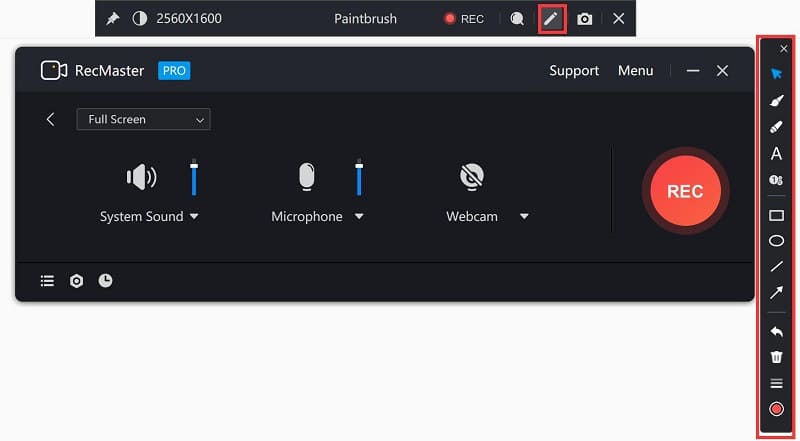
During the recording, you can use the paintbrush tools to make annotations on the screen to make your tutorial or lecture more understandable and interesting.
5. Stop the recording by pressing the stop button or Alt+2.
Next, you can find the recorded videos on the recording list where you can locate, rename, delete, merge, edit, upload, and more.
;rgba(153,153,153,0.1);rgba(153,153,153,0.5)" dur="2s" repeatCount="indefinite" /></rect></svg>)
Now you get the screen recorded with webcam on Windows.
Steps to Record Screen with Webcam on Mac
1. Download and install RecMaster for Mac
2. Choose a webcam-available recording mode.
You can choose either the Full Screen or Custom Area mode.
;rgba(153,153,153,0.1);rgba(153,153,153,0.5)" dur="2s" repeatCount="indefinite" /></rect></svg>)
3. Turn on the webcam and do audio settings.
;rgba(153,153,153,0.1);rgba(153,153,153,0.5)" dur="2s" repeatCount="indefinite" /></rect></svg>)
Same as the Windows version, on RecMaster for Mac, you can also click to choose the shape of the webcam. On the Mac version, you can also choose the quality and frame rates you hope to record.
4. Start the recording by pressing the REC button or Command+1.
If you are recording with the Custome Area mode, please do include the Webcam window in the recording area.
What’s more, with the Mac version, you can save the webcam video and the screen video in separate files.
5. Stop the recording by pressing the stop button or Command+1.
After the recording, you can file the recorded file saved on the file list. You can do options like locating, editing, merging, etc.
Now you get the screen recorded with the webcam on Mac.
Frequently Asked Questions
1. What software can I use to record my screen with webcam on Windows and Mac?
- On Windows: You can use the built-in Xbox Game Bar for basic screen recording. If you perfers easier and more effective screen recording tool, you can use RecMaster.
- Mac: QuickTime Player is a built-in option that allows for screen recording with webcam, but the settings are quite complicated. The best alternative with easier steps and more advanced features for recording screen with webcam is RecMaster for Mac.
2. How do I set up my recording area and webcam overlay in OBS Studio?
- After launching OBS Studio, add a new “Display Capture” source for your screen and a “Video Capture Device” for your webcam. Resize and position your webcam overlay as needed, ensuring it doesn’t obstruct important content on the screen.
- If you hope to record screen with webcam in easier steps, you can follow the steps above with RecMaster.
3. Can I record my screen and webcam simultaneously using QuickTime Player on Mac?
- Yes, you can record your screen and webcam simultaneously. First, start a new screen recording in QuickTime Player, then click on the arrow next to the record button and choose your webcam under the camera section for an overlay.
- If you hope to do the settings more easily, you can follow the steps above with RecMaster for Mac.
4. How can I ensure good audio quality during my screen recording?
- Use an external microphone if possible, and ensure it’s selected as the input device in your recording software. Record in a quiet environment and do a test recording to check for any background noise or audio issues.
5. Is it possible to edit my screen and webcam recording?
- Yes, with RecMaster, you can do simple editings like trimming, cutting, subtitling, delogo, etc..
- Besides, both Windows and Mac have built-in video editing tools like Photos on Windows and iMovie on Mac. For more advanced editing, software like Adobe Premiere Pro, Camtasia, or Final Cut Pro can be used.
- If you prefer free and useful editing tools, CapCut.com is also a nice option.
6. How do I save and share my recording?
- After recording, save your video in the desired format. Most recording software allows you to choose the format during the saving process. Share your video by uploading it to platforms like YouTube, Vimeo, or Google Drive, or by sending it directly via email or messaging apps.
7. What should I do if my recording software does not recognize my webcam?
- Ensure your webcam is properly connected and installed. Check the privacy settings on your computer to make sure the software has permission to use the camera. If the issue persists, try restarting the software or your computer.
8. How can I record a specific area of my screen with my webcam?
- Most recording software allows you to select a specific area of the screen to record. In RecMaster (both Windows and Mac), you can choose Custom Area mode to choose a custom size as the recording area.
Conclusion
In a word, recording screen with webcam on Windows and Mac is a straightforward process, thanks to the user-friendly RecMaster. It makes it easy for you to create a tutorial, present a webinar, or record gameplay. The ability to simultaneously capture your screen and facial expressions can significantly enhance the viewer’s experience. With the tips and instructions provided in this guide, you’re well-equipped to create professional and engaging screen recordings with ease. Happy recording!
RecMaster
Screen recording made easy.
Record every moment on your PC or Mac within few clicks.
Download Download
-
How to Use RecMaster, a Screen Recorder with Timer & Auto-Stop
-
How to Record Tutorials Like a Pro Using RecMaster?
-
The Top Halloween Screen Recorder Deals 2025
-
Step-by-Step Guide: How to Record Gameplay Without Lag?
-
RecMaster’s Secret Weapon: The Full Guide to Using the Annotation Tool for Killer Tutorials
-
RecMaster Pro-Tip: Direct MP3 Output for Scheduled Recordings (Audio-Only) 🎧
-
How to Promote Your Game with a Stunning Gameplay with RecMaster?
-
The Ultimate Guide: How to Record Mafia: The Old Country Gameplay with RecMaster?
-
How to Record Gemini Storybook with RecMaster?
-
How to Record Bendy: Lone Wolf Gameplay with RecMaster?
-
How to Set 1-Click Beauty with RecMaster for a Better Look?
-
How to Record in the Best Video Quality with RecMaster (with VBR or CBR)
-
How to Blur Your Webcam Background in RecMaster: A Quick Guide
-
How to Use Spotlight Tool in RecMaster?

RecMaster – Record Every Moment on Your Computer Screen
Record 1080p or even 4K clips at 60fps to maintain the high quality still.
Flexible settings for mouse cursor effects, watermark and annotations.
Preloaded with recording scheduler, video editor. Allow one-click sharing.
Isabella Garcia
Isabella Garcia is an experienced editor for RecMaster, She currently concentrates on writing articles about gameplay recordings and also, How-to guide to regular recordings. Her article aims to provide users with more instructive information.
Related & Hot Articles


Subscribe to keep up with the latest software discounts , news, and updates.